(Scroll to the bottom of this blog for a Full Video Tutorial)
This is the type of Wall each of the Wall Tools creates:
210: Flat Top/Trapezoidal Wall
To begin by making this Segmented Tray, start by creating a piece using one of our Rectangle Forms of your choice. Once you've created a rectangular tray, wait until it's a stiff leather hard before you begin to cut your clay strips.
Using the Diamond Core Wall Tool of your choosing cut a few strips from a slab of clay. Let the clay strips sit out for about 20 minutes before attaching so they will be stiffer and easier to attach.
Next, you will take one of the clay strips and cut it with a knife so that it fits in the tray. To do this, make a small mark on the clay strip on where the edge of the tray is. Then, make another small mark on that same clay strip to mark where the bottom of the tray is. Then cut at an angle so the top mark meets the bottom mark. Once both strips are cut, place them in the tray to make sure they fit correctly. Before fully attaching the clay strips, make sure to measure with a ruler to make sure the strips are evenly spaced from each other.
Once they are evenly spaced, make a little mark so you know where to slip and score. Use whatever score tool that you prefer, we recommend using our Wire Brush tool for scoring. Next, score on the mark you made on the tray and on the bottom of the strips clay. Add water or slip to the score marks. Then take your strips and attach them to the piece, make sure they are well attached.
You can now use the back end of the Diamond Core extruder tools to smooth out the attachment seams. Finally, get creative and have fun decorating your new piece!
Below is a full video tutorial on how to make these Segmented Trays:
]]>To begin using the Wallie Forms we recommend gluing in the Spacer Pull and Spacer Pin to the Wallie Form so that you can easily remove the Wallie from the clay. To do this, put a small amount of Wood or Elmer's Glue into the drill hole.
Next, take your Spacer Pull and Pin and attach it to the drill hole. Then hold down the Spacer Pull for 30 seconds or until the Glue has dried.
.
Next, take a slab of clay and place the Wallie Form on top of the slab. Then cut the clay slab an inch away from the Wallie Form's edge using a Knife.
Next, place the Wallie Form off to the side and compress the slab using a Large Yellow (#5) Mudtools Rib. Then grab your Wallie Form and drape the clay slab over the Form (make sure to place the compressed side of the slab onto the Form).
Now, use your hands to press the sides of the slab down so that the clay starts forming to the Wallie. Start pressing down using light-medium pressure. Once the clay takes the shape of the Wallie Form you can start applying more pressure and smoothing out the clay.
After the clay has formed to the Wallie Form, cut off any excess clay using a Knife.
Now, take your Large Yellow (#5) Mudtools Rib and compress the sides, moving in an upward motion toward the Form (this will help to strengthen the edge and corners to avoid cracking). Then compress the bottom of the piece, make sure all areas are compressed and smooth.
Next, cut the clay along the edge of the Form using a Dirty Girls Sling Shot Tool or Knife.
Next, grab the Spacer Pull with your fingers and remove the Form from the clay. Then use a drying tool of your choice to dry the clay and begin decorating your piece!
Tools used in this blog:
He is also able to cover up his wheel with a wooden MDF insert incase he needs more room to work and doesn't need to access his wheel.
Check out some of Jeff's process images below to see how it was made:
Step 1: Measure your wheel
Step 2: Build the Frame for the Tabletop that will surround your pottery wheel
Step 3: Cover the exposed frame with plywood
Step 4: Add in any shelving
Step 5: Add the tabletop (we used MDF Wood)
]]>Our new Studio Boards are lightweight and made of a material that works as a perfect release agent for the clay. However, since these boards are so lightweight and thin, they can warp quite easily.
We recommend only using the Studio Boards as a work surface and to assist when flipping work over. They are not designed to be used for drying or wedging clay on. Because the boards are thin and made of wood, they cannot be left wet for too long.
We recommend leaving the boards out to dry in-between uses, as well as flipping the boards over so you're always working on the dry side of the board.
If your board does warp, we recommend laying the warped side of the board onto the surface that you're working on, then take a slab of clay and placing it on the flatter side of the board. The board will absorb some of that moisture and start to even itself out.
For more details on how to care for the Studio Boards, watch the video below:
]]>The New RD2 Forms assist you in creating elegant formal style dinnerware, using either our new WA2 or the original WA System.
WA1 vs WA2
The difference between the WA1 and the WA2 is that the WA1 has only one pin and the Spacer in the center is circular so it will spin inside of itself, whereas the WA2 has a locking Key system which is circular with a flat side so it will rotate with the board instead of spinning inside of itself like the WA1 does. The WA2 also contains two pins which helps the RD2 Form to lock to it. The beauty of the new WA2 system is that you can now interchange between the two systems.
To interchange the WA1 with the WA2 System, you need to purchase the WA2 Key. You will then insert the WA2 Key into the WA1 center hole and add a little bit of clay to that gap (see below image for example).
This will now do essentially the same thing that the Key would do with the WA2 but allows you to use the original WA System.
If you wanted to use the old Round Forms with the WA2, you just need to remove one of the pins on the Key and it will work with the new system. You would also need to remove one of the Key pins if you wanted to use a Rim Template with the new RD2 Forms as well.
RD2 Forms:
The RD2 Forms work with both the WA1 and WA2 System. They come in two different sizes, 9" for a salad plate and 12" for a dinner plate. They have a nice smooth edge transition which allows you to make elegant, smooth plates. They aren't able to stack with each other like our other Round Forms.
Check out this video for a tutorial on how to create a plate using the new RD2 Forms and the original WA System. Please contact us if you have questions about using the new WA2 System or visit our Youtube channel for other tutorial videos.
]]>Form sizes are measured from the back side of the Form which is also the largest part of the Form. The side of the Form that has the stamp is also an indicator that you're measuring the correct side. Measurements are approximate.
Here are some examples of how you would measure some of our most common Form shapes:
If you are trying to determine what size to make, there are many factors involved. Factors would include: The size of your lip, shrinkage of clay and firing temperature.
The Depth of Standard Forms are 3/4 inch. If you want to determine the center/inside measurement, it would be 1.5 inches smaller than the Form measurements. However, our Slim Forms are only a 1/2 inch in depth.
Deeper Form Options:
If you are looking for a deeper option you can use the general rule that if a shape is 1.5 inches different in measurement it will stack with the size above or below it. We offer "Stacks" to make this available to you.
Due to the depth limitations of the wood we feel it is not practical to glue wood together to make deeper shapes. If you need this depth then it becomes more cost effective to use plaster molds.
]]>First, start off by compressing a large clay slab with a Mudtools Rib, our slab is a 1/4" thick. Double check that the slab is big enough for the 13" x 17" Oval Form to fit on.
Next, take your Oval Form and press down the smaller side of the Form onto the Clay Slab - leaving an impression of its shape.
After the leaves have soaked in water for a couple hours, take them out of the water one at a time. Carefully pat them dry using a wash cloth.
Now set the leaves down on the slab inside that impression line you made with the Oval Form and lay them out in your preferred design. Once you're happy with where you've placed the leaves - use a rolling tool and flatten the leaves into the clay. Repeat on each leaf.
Once the leaves have been flattened onto the slab, use a Loonie Knife and lift up the stem. Grab the stem and slowly lift the leaf from the clay using your fingers. If one of your leaves gets stuck, help it lift off the clay using your knife.
Now, once you've added all your texture - place the Oval Form on top of the slab, lining it up with your impression lines. Then take a piece of dry wall board and place it on top of the Form. Lift up both boards and flip. The slab should now be on top of the Oval Form.
Take off the board and use your fingers to mold the slab to the Form. Start off by adding low pressure and then slowly switch to medium-high pressure. Next, take a Mudtool's Rib and compress.
Once the slab is fully compressed you can begin adding the Platter's lip. One way to add a consistent lip is by using the Sue Tool. Simply set this tool to the width you want the lip to be and turn the center nozzle to lock that measurement in place. Then follow along the entire Form, placing the dowel against the Form's edge. The needle of the Sue Tool will be dragging through the clay which will create a mark where you will cut the lip.
Once you've made a mark with the Sue Tool - take the Loonie Knife and cut along that line. Place any extra clay off to the side.
Next, for the Oval's feet, roll out another 1/4" slab and use a Rib to compress it. Next, make an impression line with the smaller side of the Form. Then take the Foot Maker tool and follow along that impression line. Since this is a larger platter you may also want to add a smaller foot to place in the center of the Form which to avoid slumping.
Before applying the feet, take a Wire Brush Tool and score the area where the feet will be applied. Next, follow along that score mark with a wet brush. Finally, take one foot and place it on top of the area that you just scored.
To make sure the foot is fully attached, take your finger and rub the top of the feet. Next, take the Modeling tool and follow along the inside and outside edge of the feet, making sure it is fully attached.
Lastly, lift up your piece and place a 1/2" Spacer underneath it. Then press the edges down to the board - this puts the rim at an angle to avoid the rim from flopping/slumping in firing.
We hope these steps were helpful on how to create a large Oval Platter. Here is a tutorial video that goes through the above steps:
]]>If you notice the WA Spacer Pin doesn't go all the way into the Drill Hole, there is an easy solution which involves a Drill and a 3/8 Inch Drill Bit. Simply take your Drill and 3/8 Inch Drill Bit - Drill until a small amount of saw dust is created. Then make sure the pin fits in the hole completely. It is okay if the Drill Hole is drilled too deep as long as it doesn't go through the back of the Form.
Below is a quick tutorial on how to achieve this:
]]>To help you with this process, we created a step-by-step video tutorial which is embedded at the bottom of this page. However, we wanted to use this blog to go a little more in-depth on the process.
The first step when creating a plate is to start by rolling out the slab using a slab roller, in this demo we used a Bailey Slab Roller: 16 inch Mini Might II Table Top Slab Roller. If you don't own a fancy machine, rolling it out with a rolling pin works great as well, it will just be a bit more time consuming. We usually roll out our slabs to a 1/4" thick.
After rolling out the slab, use the Mudtools Rib to compress it. Make sure to compress the slab lightly and to not compress for too long to avoid stressing the clay which could result in cracking and warping.
Wheel: Artista by Speedball
Next, take the Loonie Knife to cut around the edge of the Rim Template (we used a 9.5" Daisy Template). Don't remove the excess clay because you can use it to make the feet. To create the feet, you can either use a knife or the Foot Maker tool, both work great! When using a wheel, you need to slowly put the knife in the clay and hold it steady, it's pretty easy to let the knife slip.
Once the feet are cut, carefully place the clay off to the side. Then take a slightly moist sponge and smooth out the edges of the plate. After that, carefully lift the edges of the plate so the clay doesn't stick to the WA Board when flipping it over.
Next, place a Round Form (we used a 9.5" Round Form in this demo) in the center of the clay slab. Then place the pin of the WA Spacer in the hole of the Form. Next, place the WA (Wheel Attachment) on top of the Form and the WA Spacer, the Spacer should now be in the center hole of the WA. Lift the WA off of the wheel and flip everything over, then place the WA Board off to the side. Attach the WA by sliding the linear indent over the wheel's pin, and then rotate the board until it registers with the second wheel pin.
Lightly press the clay down around the Form's edge to create the plate's lip. Now take the Mudtool's Rib and compress the bottom and edge of the plate, doing this will smooth out the plate and help prevent warping.
Now take one strip of the extra clay that was put to the side and place it on the very edge of the plate. You may want to score and slip if your clay is on the dryer side. The clay we used (Brown Bear Clay from Kentucky Mudworks) was pretty moist so scoring and slipping wasn't necessary.
Next, take the Loonie Knife and cut off any excess clay from the foot and place it to the side. Then take both ends of the foot and attach them by rubbing the clay together with your finger tips. Then attach the foot ring the same way, we usually just eyeball where the center point is, but you can also use a measuring tape.
To prevent the Form from shifting when attaching the feet, add balls of clay to the Form and the WA Board, holding everything in place.
Now take a moist sponge and your finger tips to shape and attach the feet. Let the top of the feet glide against the sponge and use your thumb and index finger and slightly pinch the sides of the feet. Then take the Kemper Modeling Tool and let the edges of the feet glide against it, this will help to shape and attach the feet.
Now take the time to sign your piece and get creative with your glazing!
Here is an entire video that walks you through the above process of making a plate with a beautiful rim by precutting the slab!
]]>Although there is no one reason for warping, there are quite a few common issues that happen in the building and firing process that we want to make you aware of. With past experience, and using some of the great information we found online, we came up with a list of the most common reasons why pieces warp and how you can prevent this from happening in the future.
The first step to avoid warping is properly compressing the slab–after rolling it out, we completely compress one side of the slab using a rib.
We then drape the slab over the form, and compress the other side while it’s on the form.
After compression and completing any foot or lip prep (adding spacer), we don’t touch the object until it is quite a stiff leather hard (the form pops out on its own). You should be able to press a finger nail into the clay and leave a mark, but you should not be able to form an impression with the soft part of your finger.
Visit our FAQ page to learn each step we take when creating a platter with our forms, we have found that this is the best way to avoid warping in the creation process.
More hand building tips to prevent warping:
Once the clay is a stiff leather hard, we lift it off the form. If it bends or moves in any way after lifting it off, you’ve taken it off too soon. We’ve found that removing the slab too soon is the single most significant factor toward warping the piece. Also trying to flip it over before it dries enough might cause the ends to start curling upward. I’m sure you know how difficult it is to “be there at the right time,” but the importance of removing the piece at the right time cannot be understated. If you are making objects with a lip you must use a spacer.
More drying tips:
Here are the most common types of warping people experience when using our forms, along with some causes and fixes to prevent this from happening in the future.
Jeff also goes more in-depth on these types of warping and ways to prevent it from happening in one of our livestreams:
We hope this has helped to provide more clarity on how to prevent warping. If you have any questions please contact us by visiting our contact page.
Helpful information we discovered while researching on the internet:
]]>It can be so frustrating to spend precious time on a piece, only to have a crack start to form in the drying process.
With past experience, and using some of the great information we found online, we came up with a list of the most common reasons why pieces crack and how you can prevent this from happening in the future. As well as different ways you can fix these dreaded cracks.
Some of the information has also been pulled from some amazing artists that have written books in this regard, and we have referenced them at the end of this article.
A few of the most common causes for cracks in the clay are the drying process, the type of clay used and the way the clay was handled during the building process. However, the root of all cracks is stress.
I will be going more in-depth as to why cracks occur from these common issues:
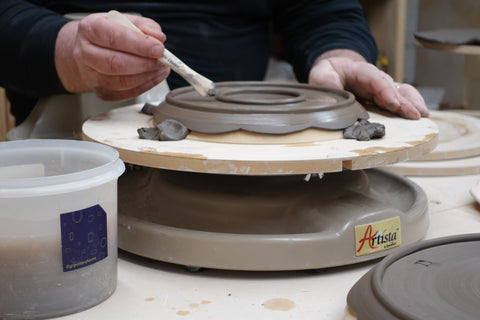
The weather can play a huge role in how fast or slow your work drys. A great solution to help control this is by getting a cart or rack with several shelves to place your work on; you can then place two sheets of plastic over it to better control the drying process (see example image below).
Image taken from YouTube: Drying Pots to Prevent Cracking
If the weather is humid, open up the plastic covering, but if it is really dry out then don't let any air inside your cart because it will make the clay dry much faster. You can prevent air from entering by adding clips to any openings of the plastic tarp.
Here are a few other reasons why cracks might occur in the drying process:
Clay with high plasticity tends to crack more when drying. The reason for this is because plastic clay has smaller clay particles, so there is more surface area in the clay for water to adhere to.
If you do use clay with plasticity it must be dried slowly and evenly. If one part of a clay object dries more rapidly than another, the unequal shrinkage between the two portions may cause warping or cracking. This may happen when a clay post is dried in the sun or in a place where a draft strikes one side.
Although porcelain clay is not a plastic clay body, it does have a high water content. As such, it is prone to shrink very quickly when drying which makes it at a higher risk of cracking.
Solution:
Start using clay with grog (grog is clay that has been fired and then ground up into granules.) Grog in clay reduces cracking during the drying process.
Clay with grog in it shrinks less because the fired clay that makes up the grog has less water content. Because clay with grog shrinks less, the pottery undergoes less stress during the drying process. As a result, it is less likely to crack.
If you would like to continue to use clay with plasticity just make sure it dries evenly and not too fast.
Here are some of the most common mistakes people make in the building process:
Sources:
Clay and Glazes for the Potter by Daniel Rhodes
Mastering Hand Building by Sunshine Cobb
The Potter's Dictionary of Materials and Techniques
How to dry your pottery without getting cracks
]]>The Rim Templates can be used with our Round Forms and Round Slims. The purpose of the Rim Template is to help you seamlessly create the shape of your plate's edge. To create the shape of your chosen Rim Template simply use a Knife or The Dirty Girl's Slingshot Tool and follow along the Template's edge.
Above are a few examples of what the lip of your plate will look like when you combine a Rim Template with a certain size Round Form. You can use any of our Round Forms with the Templates as long as your Form isn't larger than the size of the Rim Template.
*We are using the Poppy Template in this example to give you an idea of the portion size*
All Forms and Rim Templates are measured in inches.
Below is a quick video of how we've used our Rim Templates with the Dirty Girl's Sling Shot Tool. When they are used together it makes it so easy to create that beautiful edge shape. We are using the Daisy Rim Template in this video.
]]>Rim Template 2 packs include:
1 - Salad plate template 10.5"
1 - Dinner Plate template 13.5"
]]>
GR Pottery Forms was launched at the 2014 NCECA conference in Milwaukee through our first distributor, Rovin Ceramics. We nearly sold out in the first day of the three day conference. Now we have over 45 US distributors and 8 International distributors, as well as an active social media presence and eCommerce store.
Jeff Rottman designed the forms to make his own work as a production potter in 2002. Prior to that, he worked as a merchandiser/sales rep in Home Improvement stores where he had began to wonder if one of the multiple wood materials would work more efficiently than plaster. The current starter set represents the sizes he used the most.
He then added tools and tricks along the way, problem-solving his way into a whole line of products. Being a full-time production potter and offering classes to the community around him helped to develop the business. Sharing ideas, learning from the participants in classes, and garnering the support of the pottery community was also a big part of the development.
Keep solving problems and you will be surprised where you end up.
Thanks so much for your support! Especially those of you who have been a part of this from the beginning! As a small business, we've overcome big hurdles, and we owe that to all of you.
We hope you find great success with clay and enjoy using the forms.
All the Best,
Your GR Pottery Forms Team